Wednesday 24 June 2009

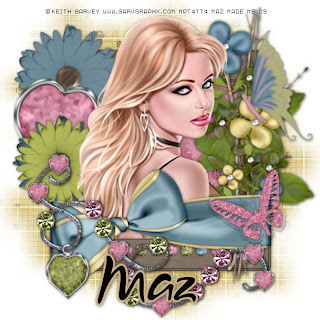
Splendid Times


Here is tut for you all.
Enjoy!

Click tag to get full view.
You must have a working knowledge of PSP.
I am using the beautuful artwork of Keith Garvey.
You must purchase a license to use this art.
You may do so at MPT HERE
Supplies:
1 tube of choice & Font of choice.
Mask of choice
Scrapkit Freebie Called Splendid Times
It Can be found at:
Scrappy bit of Fun: HERE
Thank You !
Easy Tut,
Are you Ready?
Open your supplies in PSP.
Open a new canvas 700x700, you may resize/crop later.
Floodfill white. Add a new raster layer. Selections,
select all. Resize & Copy and paste a paper
from the kit into selection. Select none. Apply
a mask, and on your layers pallette merge mask group.
Resize and paste your frame as a new layer
click inside your frame,selection,modify,expand by 6 resize &
paste paper of choice,selection,invert delete on your keyboard,
then selection and then select none move paper below frame.
Resize and paste tube of choice place below your frame layer
duplicate tube then move the duplicate layer above you frame,
Grab your eraser tool and erase any bits of tube from the bottom.
Resize and paste flowers of choice,place top right
Resize and paste elements and place where you wish.
Drop shadow all elements and Tube.
See mine above or make it your own!
As always mine is just a guide. Now X out
the bottom layer and your mask layer. Merge visable
the remaining layers. Un X the hidden layers. Position
all layers nicely. Image Resize 80-90% Bicubic
resample all layers checked.
Hint: You can X out the bottom white layer
before saving to have a transparent bkg for forums.
Add your Artist © and your Name
You Are Done!
Hope you enjoyed my tutorial & thanks for trying it!
Written by Maz June 24th, 2009
Any resemblance to another tutorial is purely coincidental
Monday 15 June 2009

American Beauty

Here is tut for you all.
Remember to leave some LUV.

A Thank You goes a long way!
Enjoy!

Click tag to get full view.
You must have a working knowledge of PSP.
I am using the beautuful artwork of Keith Garvey.
You must purchase a license to use this art.
You may do so at MPT
HERE
Supplies: 1 tube of choice & Font of choice.
I used The Pussycat.
Mask of choice.
Scrapkit Freebie Called Independance Day
It Can be found at: Alyssa's Scraps n Such:
HERE
Thank You Alyssa!
Easy Peasy Tut, Ready?
Open your supplies in PSP.
Open a new canvas 700x700, you may resize/crop later.
Floodfill white. Add a new raster layer. Selections,
select all. Resize & Copy and paste a paper
from the kit into selection. Select none. Apply
a mask, and on your layers pallette merge mask group.
Resize and paste round frame of choice as a new layer
click inside your frame,selection,modify,expand by 4 resize &
paste paper of choice,selection,invert delete on your keyboard,
then selection and then select none move paper below frame layer
duplicate tube then move the duplicate layer above you frame,
Grab your eraser tool and erase any bits of tube from the bottom.
Resize and paste elements and place where you wish.
Drop shadow all elements and Tube.
See mine above or make it your own!
As always mine is just a guide. Now X out
the bottom layer and your mask layer. Merge visable
the remaining layers. Un X the hidden layers. Position
all layers nicely. Image Resize 80-90% Bicubic
resample all layers checked.
Hint: You can X out the bottom white layer
before saving to have a transparent bkg for forums..
Add your Artist © and your Name
and WooT!! You Are Done!
Hope you enjoyed my tutorial & thanks for trying it!
Written by Maz June 15th, 2009
Any resemblance to another tutorial is purely coincidental


Tuesday 9 June 2009

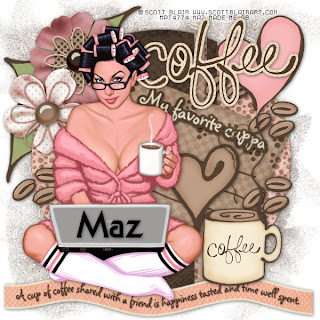
Coffee Break


Here is tut for you all.
Remember to leave some LUV.

A Thank You goes a long way!Enjoy!

Click tag to get full view.
You must have a working knowledge of PSP.
I am using the beautuful artwork of Scott Blair .
You must purchase a license to use this art.
You may do so at MPT
HERE

Supplies:
Scrapkit Awesome FTU Kit
Called;My Favorite Thing
It Can be found at:
Lyndsay Riches Designs:
HERE
Thank you Lyndsay

Tube of choice & Font of choice.
I used Final Fontier.
Mask of choice.
Template #118 by Missy
It Can be found :
HERE
Thank You Missy !

Ready? Lets go
Open your Template #118 by Missy,
Delete copyright layer.
Go to image then canvas size 600x600.
In your layer pallet go 2 the bottom layer
which is the background & flood fill white.
I resized all layers for the template to 105
I deleted the fame & frame background.
Add a new raster layer. Selections,
select all. Resize & Copy and paste a paper
from the kit into selection. Select none. Apply
a mask, and on your layers pallette merge mask group.
Click on Circle layer,selections,select all,float,defloat
Resize n paste paper of choice,selection,invert,delete on keyboard.
Repeat the steps above to do the rest of the of the template
Resize paste your tube of choice,
Resize and paste leaves,place top left,resize flowers of
choice and place top left on mask layer n below leaves layer
Resize and paste elements and place where you wish.
Drop shadow all elements and Tubes.

See mine above or make it your own!
As always mine is just a guide.Now X out the bottom
layer and your mask layer. Merge visable the
remaining layers. Un X the hidden layers.
Position all layers nicely.
Image Resize 80-90% Bicubic resample all layers checked.

Hint: You can X out the bottom white layer
before saving to have a transparent bkg for forums.

Add your Artist © and your Name andWooT!!
You Are Done!
Hope you enjoyed my tutorial & thanks for trying it!

Written by Maz June 9th, 2009
Any resemblance to another tutorial is purely coincidental
Monday 8 June 2009

Peaches n Cream


Here is tut for you all.
Remember to leave some LUV .
A Thank You goes a long way! Enjoy!
♥ Click tag to get full view.
You must have a working knowledge of PSP.
I am using the beautuful artwork of Jennifer Janesko.
You must purchase a license to use this art.
You may do so at CLIM HERE
Supplies:
1 tube of choice & Font of choice.
I used Roselyn
Mask of choice.
Awesome FTU Kit
Called My Peach Love
From Bel Vidotti Scraps
Thank You Bel !
Easy Peasy Tut, Ready?
Open your supplies in PSP.
Open a new canvas 700x700, you may resize/crop later.
Floodfill white. Add a new raster layer. Selections, select all.
Resize & Copy and paste a paper from the kit into selection.
Select none. Apply a mask, and on your layers pallette merge mask group.
Resize and paste frame as a new layer. click inside your frame,
selection,modify, expand by 6 resize & paste paper of choice,
selection,invert delete on your keyboard,
then selection and then select none move paper below frame.
Resize and paste tube of choice place below your frame
layer duplicate tube then move the duplicate layer above you frame,
Grab your eraser tool and erase any bits of tube from the bottom.
Resize and paste glitter and place above your mask layer.
Resize and paste leaves place top left above mask layer
Resize and paste elements and place where you wish.
Drop shadow all elements and Tube.
See mine above or make it your own!
As always mine is just a guide.
Now X out the bottom layer and your mask layer.
Merge visable the remaining layers. Un X the hidden layers.
Position all layers nicely.
Image Resize 80-90% Bicubic resample all layers checked.
Hint: You can X out the bottom white layer
before saving to have a transparent bkg for forums..
Add your Artist © and your Name
WooT!! You Are Done!
Hope you enjoyed my tutorial & thanks for trying it!
Written by Maz June 8th, 2009
Any resemblance to another tutorial is purely coincidential.

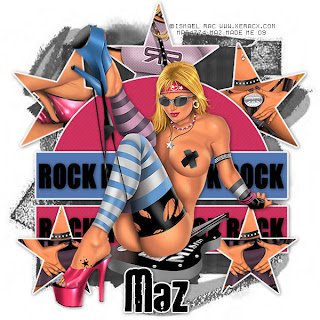
Rock Chick


Here is tut for you all.
Remember to leave some LUV.

A Thank You goes a long way!
Enjoy!

Click tag to get full view.
You must have a working knowledge of PSP
I am using the beautuful artwork of Ismael rac.
You must purchase a license to use this art.
You may do so at MPT
HERE

Supplies:
Tubes of choice & Font of choice.
I used Rock it.
Mask of choice. Template #50 by Lou
You can get it
HERE
Thank you Lou
Filter- Candy eye 4000 (optional)
Ready? Lets go
Easy Peasy Tut, Ready?

Open your Template #5o by Lou,Delete copyright layer.
Go to image and resize canvas 600x600
In your layer pallet go 2 the bottom layer
which is the background & flood fill white
Add a new raster layer. Selections,select all.
Floodfill with colour of choice i chose colour from tube.
Select none. Apply a mask,
and on your layers pallette merge mask group.
Got to the 1 of the stars layer,selections,select all,float,defloat
Resize paste tube of choice, repeat for other star layers.
Got to the 1 of the halfed circle layer,
selections,select all,float,defloat add new layer
Floodfill with colour of choice i chose colour from tube
Repeat the steps above for the rectangle.
I added gradient glow filter colour white.
Resize and paste your main tube of choice,
Drop shadow all layers and Tubes.

See mine above or make it your own!
As always mine is just a guide. Now X out
the bottom layer and your mask layer. Merge visable
the remaining layers. Un X the hidden layers. Position
all layers nicely. Image Resize 80-90% Bicubic
resample all layers checked.

Hint: You can X out the bottom white layer
before saving to have a transparent bkg for forums..
Add your Artist © and your Name
WooT!! You Are Done!
Hope you enjoyed my tutorial & thanks for trying it!

Written by Maz June 8th, 2009
Any resemblance to another tutorial is purely coincidental

Sunday 7 June 2009

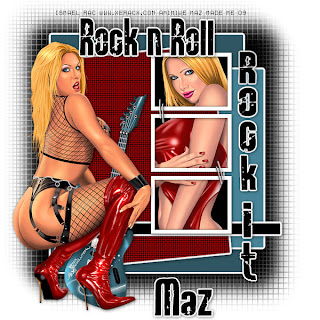
Rock It


Here is tut for you all.
Remember to leave some LUV.

A Thank You goes a long way!
Enjoy!

Click tag to get full view.
You must have a working knowledge of PSP
I am using the beautuful artwork of Ismael rac.
You must purchase a license to use this art.
You may do so at AMI
HERE

Supplies:
No Scrapkit used
2 tubes of choice & Font of choice.
I used Rock it.
Mask of choice.
Template #35 by sara
You can get it
HERE
TY Sara

Ready? Lets go
Easy Peasy Tut, Ready?
Open your Template #35 by Sara,Delete copyright layer.
Go to image and resize canvas 600x600
In your layer pallet go 2 the bottom layer
which is the background & flood fill white
Add a new raster layer. Selections,select all.
Floodfill with colour of choice i chose colour from tube.
Select none. Apply a mask,
and on your layers pallette merge mask group.
Got to the frame layer,selections,select all,float,defloat
Then floodfill black select none, repeat for other 2 frames.
Repeat the steps above for the rest of the template.
Floodfill with colour of choice i uses colours from tube.
Grab your magic wand and click inside the frame,
selections,modify,expand by 4 and add your tube,
repeat this step for the other 2 frames and add you tube.
Resize and paste your main tube of choice,
Drop shadow all layers and Tubes.

See mine above or make it your own!
As always mine is just a guide. Now X out
the bottom layer and your mask layer. Merge visable
the remaining layers. Un X the hidden layers.
Position all layers nicely.
Image Resize 80-90% Bicubic
resample all layers checked.
Hint: You can X out the bottom white layer
before saving to have a transparent bkg for forums.
Add your Artist © and your Name and WooT!!
You Are Done!
Hope you enjoyed my tutorial & thanks for trying it!

Written by Maz June 7th, 2009
Any resemblance to another tutorial is purely coincidental
Friday 5 June 2009

Award

I have had this Award passed on from Rachel
TYVM Rachel


Tropicano


Here is tut for you all
Remember to leave some LUV.

A Thank You goes a long way!
Enjoy!

Click tag to get full view.
You must have a working knowledge of PSP.
I am using the beautuful artwork of Arty Basheff.
You must purchase a license to use this art.
You may do so at MPT HERE
Supplies:
1 tube of choice & Font of choice.
I used Pharmacy.
Mask of choice.

Scrapkit was PTU is now a Freebie
Called Tropical
It Can be found at:
Cinnaman Scraps: HERE
Thank You Laura !
Easy Peasy Tut, Ready?
Open your supplies in PSP. Open a new
canvas 700x700, you may resize/crop later.
Floodfill white. Add a new raster layer. Selections,
select all. Resize & Copy and paste a paper
from the kit into selection. Select none. Apply
a mask, and on your layers pallette merge mask group.
Resize and paste frame 11 as a new layer
Take magic wand hold down the shift key and click inside the
frame selection,modify,expand by 4 resize &
paste paper of choice,selection,invert delete on your keyboard,
then selection and then select none move paper below frame.
Resize and paste tube of choice
Resize and paste elements and place where you wish.
Drop shadow all elements and Tube.
See mine above or make it your own!
As always mine is just a guide. Now X out
the bottom layer and your mask layer. Merge visable
the remaining layers. Un X the hidden layers. Position
all layers nicely. Image Resize 80-90% Bicubic
resample all layers checked.
Hint: You can X out the bottom white layer
before saving to have a transparent bkg for forums..
Add your Artist © and your Name
WooT!! You Are Done!
Hope you enjoyed my tutorial & thanks for trying it!
Written by Maz June 5th, 2009
Any resemblance to another tutorial is purely coincidental
Heart Breaker


Here is tut for you all.
Remember to leave some LUV.

A Thank You goes a long way!
Enjoy!

Click tag to get full view.
You must have a working knowledge of PSP.
I am using the beautuful artwork of Keith Garvey.
You must purchase a license to use this art.
You may do so at MPT HERE
Supplies:
1 tube of choice & Font of choice.
I used The Nautigal.
Mask of choice.

Scrapkit Freebie Called I heart you
It Can be found at:
Misfits Scapz: HERE
Thank You !
Easy Peasy Tut, Ready?
Open your supplies in PSP. Open a new
canvas 700x700, you may resize/crop later.
Floodfill white. Add a new raster layer. Selections,
select all. Resize & Copy and paste a paper
from the kit into selection. Select none. Apply
a mask, and on your layers pallette merge mask group.
Resize and paste doodles and place above your mask layer
Resize and paste round frame as a new layer
click inside your frame,selection,modify,expand by 4 resize &
paste paper of choice,selection,invert delete on your keyboard,
then selection and then select none move paper below frame.
Resize and paste tube of choice place below your frame layer
duplicate tube then move the duplicate layer above your frame
Grab your eraser tool and erase any bits of tube from the bottom.
Resize and paste elements and place where you wish.
Drop shadow all elements and Tube.
See mine above or make it your own!
As always mine is just a guide. Now X out
the bottom layer and your mask layer. Merge visable
the remaining layers. Un X the hidden layers. Position
all layers nicely. Image Resize 80-90% Bicubic
resample all layers checked.
Hint: You can X out the bottom white layer
before saving to have a transparent bkg for forums.
Add your Artist © and your Name
Woot!!You Are Done!
Hope you enjoyed my tutorial & thanks for trying it!
Written by Maz June 5th, 2009
Any resemblance to another tutorial is purely coincidental

Wednesday 3 June 2009

Framed Beauty


Here is tut for you all
Remember to leave some LUV.

A Thank You goes a long way!
Enjoy!

Click tag to get full view.
You must have a working knowledge of PSP.
I am using the beautuful artwork of Steve Baier.
You must purchase a license to use this art.
Can be found
HERE

Supplies:

1 tube of choice & Font of choice.
I used Passion Conflict (ROB).
Mask of choice.

Scrapkit Freebie Called Get Fresh
It Can be found at:
Bel Vidotti Scraps:
HERE
Thank You Bel !

Easy Peasy Tut, Ready?
Open your supplies in PSP.
Open a new canvas 700x700, you may resize/crop later.
Floodfill white Add a new raster layer. Selections, select all.
Resize & Copy and paste a paper from the kit into selection.
Select none. Apply a mask, and on your layers pallette merge mask group.
Resize and paste frame as a new layer. click inside your frame,
selection,modify, expand by 6 resize & paste paper of choice,
selection,invert delete on your keyboard,
then selection and then select none move paper below frame.
Resize and paste tube of choice place below your frame
layer duplicate tube then move the duplicate layer above you frame,
Grab your eraser tool and erase any bits of tube from the bottom.
Resize and paste leaves place top left position
resize and paste flowers of choice and position onto canvas
Place above your mask layer and postion
Resize and paste elements and place where you wish.
Drop shadow all elements and Tube.

See mine above or make it your own!
As always mine is just a guide. Now X out
the bottom layer and your mask layer. Merge visable
the remaining layers. Un X the hidden layers. Position
all layers nicely. Image Resize 80-90% Bicubic
resample all layers checked.
Hint: You can X out the bottom white layer
before saving to have a transparent bkg for forums..
Add your Artist © and your Name and
WooT!! You Are Done!
Hope you enjoyed my tutorial & thanks for trying it!

Written by Maz June 2nd, 2009
Any resemblance to another tutorial is purely coincidenta
l

Get Fresh

Here is tut for you all
Remember to leave some LUV.

A Thank You goes a long way!
Enjoy!

Click tag to get full view.
You must have a working knowledge of PSP.
I am using the beautuful artwork of Steve Baier.
You must purchase a license to use this art.
Can be found
HERE
Supplies:
1 tube of choice & Font of choice.
I used A&S Snapper Script.
Mask of choice.

Scrapkit Freebie Called Get Fresh
It Can be found at:
Bel Vidotti Scraps:
HERE
Thank You Bel !

Easy Peasy Tut, Ready?
Open your supplies in PSP.
Open a new canvas 700x700, you may resize/crop later.
Floodfill white. Add a new raster layer. Selections, select all.
Resize & Copy and paste a paper from the kit into selection.
Select none. Apply a mask, and on your layers pallette merge mask group.
Resize and paste frame as a new layer. click inside your frame,
selection,modify, expand by 6 resize & paste paper of choice,
selection,invert delete on your keyboard,
then selection and then select none move paper below frame.
Resize and paste tube of choice place below your frame
layer duplicate tube then move the duplicate layer above you frame,
Grab your eraser tool and erase any bits of tube from the bottom.
Resize and paste leaves place top left position and image,duplicate,
Place above your mask layer and postion
Resize and paste elements and place where you wish.
Drop shadow all elements and Tube.

See mine above or make it your own!
As always mine is just a guide. Now X out
the bottom layer and your mask layer. Merge visable
the remaining layers. Un X the hidden layers. Position
all layers nicely. Image Resize 80-90% Bicubic
resample all layers checked.
Hint: You can X out the bottom white layer
before saving to have a transparent bkg for forums..
Add your Artist © and your Name and
WooT!! You Are Done!
Hope you enjoyed my tutorial & thanks for trying it!

Written by Maz June 2nd, 2009
Any resemblance to another tutorial is purely coincidental