Thursday 28 May 2009

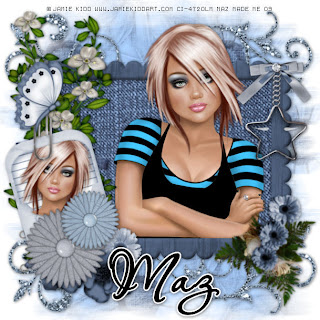
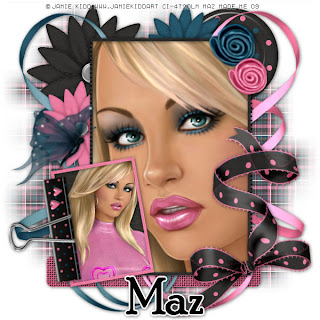
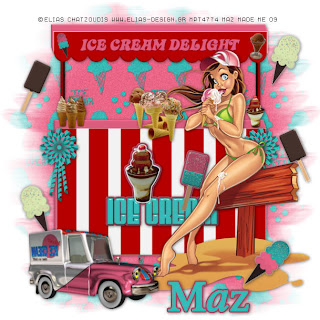
Pink-a-Licious


Here is tut for you all.
Remember to leave some LUV .

A Thank You goes a long way! Enjoy!

Click tag to get full view.
You must have a working knowledge of PSP.
I am using the beautuful artwork of Jamie Kidd.
You must purchase a license to use this art.
You may do so at CLIM
HERE

Supplies:
1 tube of choice & Font of choice.
I used PassionsConflict ROB
Mask of choice.
Filter - Mura's Meister Scrapkit
Awesome FTU Kit
Called Pretty In Pink
From SimplySensationalScraps
HERE
Thank You Monica !

Easy Peasy Tut, Ready?

Open your supplies in PSP.
Open a new canvas 700x700, you may resize/crop later.
Floodfill white. Add a new raster layer. Selections, select all.
Resize & Copy and paste a paper from the kit into selection.
Select none. Apply a mask, and on your layers pallette merge mask group.
Resize flower of choice place in middle of canvas above mask layer
then apply the filter - Mura's Meister with the following settings
Copies -Encircle - Number 12 - shift X and Y 50
Leave rest of setting as they are.
Resize a 2nd flower and place in middle of canvas above mask layer
apply the filter and use the same setting as other flower
Resize and paste frame as a new layer. click inside your frame,
selection,modify, expand by 6 resize & paste paper of choice,
selection,invert delete on your keyboard,
then selection and then select none move paper below frame.
Resize and paste tube of choice place below your frame
layer duplicate tube then move the duplicate layer above you frame,
Grab your eraser tool and erase any bits of tube from the bottom.
Resize and paste elements and place where you wish.
Drop shadow all elements and Tube.
See mine above or make it your own!
As always mine is just a guide.
Now X out the bottom layer and your mask layer.
Merge visable the remaining layers. Un X the hidden layers.
Position all layers nicely.
Image Resize 80-90% Bicubic resample all layers checked.

Hint: You can X out the bottom white layer
before saving to have a transparent bkg for forums..

Add your Artist © and your Name and WooT!!
You Are Done!
Hope you enjoyed my tutorial & thanks for trying it!

Written by Maz May 28thth, 2009
Any resemblance to another tutorial is purely coincidential
.

Pretty In Pink


Here is tut for you all.
Remember to leave some LUV .

A Thank You goes a long way! Enjoy!

Click tag to get full view.
You must have a working knowledge of PSP.
I am using the beautuful artwork of Elias Chatzoudis.
You must purchase a license to use this art.
You may do so at MPT
HERE

Supplies:
1 tube of choice & Font of choice.
I used PassionsConflict ROB
Mask of choice.
I used - Weescotslass mask 84
Found at her new blog.

HERE
Thank You !


Awesome FTU Kit Called Pretty In Pink
From SimplySensationalScraps
HERE
Thank You Monica !

Easy Peasy Tut, Ready?

Open your supplies in PSP.
Open a new canvas 700x700, you may resize/crop later. Floodfill white.
Add a new raster layer. Selections, select all.
Resize & Copy and paste a paper from the kit into selection.
Select none. Apply a mask, and on your layers pallette merge mask group.
Resize and paste frame as a new layer. click inside your frame,
selection,modify, expand by 6 resize & paste paper of choice,
selection,invert delete on your keyboard, then selection and then
select none move paper below frame.
Resize and paste tube of choice place below your frame
layer duplicate tube then move the duplicate layer above you frame,
Grab your eraser tool and erase any bits of tube from the bottom.
Resize and paste elements and place where you wish.
Drop shadow all elements and Tube.
See mine above or make it your own!
As always mine is just a guide.
Now X out the bottom layer and your mask layer.
Merge visable the remaining layers. Un X the hidden layers.
Position all layers nicely.
Image Resize 80-90% Bicubic resample all layers checked.

Hint: You can X out the bottom white layer
before saving to have a transparent bkg for forums..

Add your Artist © and your Name and WooT!!
You Are Done!
Hope you enjoyed my tutorial & thanks for trying it!

Written by Maz May 28thth, 2009
Any resemblance to another tutorial is purely coincidential.
Tuesday 26 May 2009

TLW


Here is tut for you all.
Remember to leave some LUV.

A Thank You goes a long way!Enjoy!

I am using the beautuful artwork of Dominic Marco
.You must purchase a license to use this art.
You may do so at CILM
HERE

Supplies:
2 tubes of choice & Font of choice.
I used Will & Grace.
Mask of choice.
Template #72 by Melissa
It Can be found at:Melissaz Creationz
HERE
Thank You !

Ready? Lets go

Open your Template #72 by Melissa,
Delete copyright layer.
Go to image then canvas size 600x600.
In your layer pallet go 2 the bottom layer
which is the background & flood fill white
Add a new raster layer. Selections,select all.
Floodfill with colour of choice i chose colour from tube.
Select none. Apply a mask,
and on your layers pallette merge mask group.
Got to the frame layer,selections,select all,float,defloat
Then floodfill black select none.
Repeat the steps above to do the rest of the of the template.
Floodfill with colour of choice i uses colurs from tube.
Grab your magic wand and click inside the frame,
selections,modify,expand by 2 floodfill with colour from tube,
Resize paste your tube of choice,
Repeat above steps for other frame
Resize and paste elements and place where you wish.
Drop shadow all elements and Tubes.

See mine above or make it your own!
As always mine is just a guide.Now X out the bottom
layer and your mask layer. Merge visable the
remaining layers. Un X the hidden layers.
Position all layers nicely.
Image Resize 80-90% Bicubicresample all layers checked.

Hint: You can X out the bottom white layer
before saving to have a transparent bkg for forums..

Add your Artist © and your Name andWooT!!
You Are Done!
Hope you enjoyed my tutorial & thanks for trying it!

Written by Maz May 26th, 2009
Any resemblance to another tutorial is purely coincidental

Pastel Rainbow


Here is tut for you all.
Remember to leave some LUV .

A Thank You goes a long way! Enjoy!

I am using the beautuful artwork of Keith Garvey.
You must purchase a license to use this art.
You may do so at MPT
HERE

Supplies:
1 tube of choice & Font of choice.
I used Fabulous 50's. Mask of choice.
Freebie Called Rainbow Wishes
It Can be found at:Melissaz Creationz
HERE
Thank You !

Easy Peasy Tut, Ready?
Open your supplies in PSP.
Open a new canvas 700x700, you may resize/crop later.
Floodfill white. Add a new raster layer. Selections, select all.
Resize & Copy and paste a paper from the kit into selection.
Select none. Apply a mask, and on your layers pallette merge mask group.
Resize and paste Doodle and place above your mask layer,
layers,duplicate,image,mirror
Resize and paste cluster of hearts and palce above your mask layer layers,duplicate,image,mirror .
Resize and paste frame as a new layer. click inside your frame,
selection,modify, expand by 6 resize & paste paper of choice,
selection,invert delete on your keyboard,
then selection and then select none move paper below frame.
Resize and paste tube of choice place below your frame
layer duplicate tube then move the duplicate layer above you frame.
Grab your eraser tool and erase any bits of tube from the bottom.
Resize and paste elements and place where you wish.
Drop shadow all elements and Tube.
See mine above or make it your own!
As always mine is just a guide.
Now X out the bottom layer and your mask layer.
Merge visable the remaining layers. Un X the hidden layers.
Position all layers nicely.
Image Resize 80-90% Bicubic resample all layers checked.

Hint: You can X out the bottom white layer
before saving to have a transparent bkg for forums..

Add your Artist © and your Name and WooT!!
You Are Done!
Hope you enjoyed my tutorial & thanks for trying it!

Written by Maz May 26th, 2009
Any resemblance to another tutorial is purely coincidential.

Daydreamer


Here is tut for you all.
Remember to leave some LUV
.♥
A Thank You goes a long way! Enjoy!

I am using the beautuful artwork of Jamie Kidd.
You must purchase a license to use this art.
You may do so at CLIM
HERE

Supplies:
1 tube of choice & Font of choice.
I used SignPainter HouseScript.
Mask of choice.
Filter - Mura's Meister Scrapkit
Freebie Called Emily
It Can be found at: Juicy Bits:
HERE
Thank You !

Easy Peasy Tut, Ready?
Open your supplies in PSP.
Open a new canvas 700x700, you may resize/crop later.
Floodfill white. Add a new raster layer. Selections, select all.
Resize & Copy and paste a paper from the kit into selection.
Select none. Apply a mask, and on your layers pallette merge mask group.
Resize flower of choice place in middle of canvas above mask layer
then apply the filter - Mura's Meister with the following settings
Copies -Encircle - Number 12 - shift X and Y 50
Leave rest of setting as they are.
Resize and paste Branches and place above your mask
layer,layers,duplicate,image,mirror
Resize and paste blossom and palce above your mask layer
layers,duplicate,image,mirror .
Resize and paste frame as a new layer. click inside your frame,
selection,modify, expand by 6 resize & paste paper of choice,
selection,invert delete on your keyboard, t
hen selection and then select none move paper below frame.
Resize and paste tube of choice place below your frame
layer duplicate tube then move the duplicate layer above you frame,
Grab your eraser tool and erase any bits of tube from the bottom.
Resize and paste elements and place where you wish.
Drop shadow all elements and Tube.
See mine above or make it your own!
As always mine is just a guide.
Now X out the bottom layer and your mask layer.
Merge visable the remaining layers. Un X the hidden layers.
Position all layers nicely.
Image Resize 80-90% Bicubic resample all layers checked.

Hint: You can X out the bottom white layer
before saving to have a transparent bkg for forums..

Add your Artist © and your Name and WooT!!
You Are Done!
Hope you enjoyed my tutorial & thanks for trying it!

Written by Maz May 26thth, 2009
Any resemblance to another tutorial is purely coincidential.

Friday 22 May 2009

Denim Girl


Here is tut for you all.
Remember to leave some LUV
.♥
A Thank You goes a long way!
Enjoy!

I am using the beautuful artwork of Keith Garvey.
You must purchase a license to use this art.
You may do so at MPT
HERE

Supplies:
1 tube of choice & Font of choice.
I used SignPainter HouseScript.
Mask of choice.

Another Fabby Freebie Kit
From Tantrum Scraps which is now closed..
It's Called B.F.F.
And It Can now be found:
HERE
Under scrapkits
Thank You Tantrum!

Easy Peasy Tut, Ready?
Open your supplies in PSP.
Open a new canvas 700x700,
you may resize/crop later. Floodfill white.
Add a new raster layer. Selections, select all.
Resize & Copy and paste a paper from the kit into selection.
Select none. Apply a mask, and on your layers pallette
merge mask group.
Resize and paste doodle and place above your mask layer,
duplicate,image then miror and position.
Resize and paste suare frame as a new layer click inside your frame,
selection,modify,expand by 6 resize & paste paper of choice,
selection,invert delete on your keyboard,
then selection and then select none move paper below frame.
Resize and paste tube of choice place below your frame layer
duplicate tube then move the duplicate layer above you frame,
Grab your eraser tool and erase any bits of tube from the bottom.
Resize and paste notebook,use your deform tool to rotate a little to left.
Resize and paste elements and place where you wish.
Drop shadow all elements and Tube.

See mine above or make it your own!
As always mine is just a guide.
Now X out the bottom layer and your mask layer.
Merge visable the remaining layers.
Un X the hidden layers. Position all layers nicely.
Image Resize 80-90% Bicubic resample all layers checked.
Hint: You can X out the bottom white layer before
saving to have a transparent bkg for forums..

Add your Artist © and your Name and WooT!! You Are Done!
Hope you enjoyed my tutorial & thanks for trying it!

Written by Maz May 22nd, 2009
Any resemblance to another tutorial is purely coincident

Thursday 21 May 2009

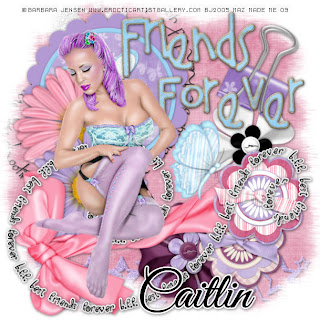
Forever Friends


Here is tut for you all.
Remember to leave some LUV.

A Thank You goes a long way! Enjoy!

I am using the beautuful artwork of Barbara Jensen.
You must purchase a license to use this art.
You may do so at
HERE

Supplies:
1 tube of choice & Font of choice.
I used Good Vibrations (ROB).
Mask of choice.
Scrapkit Freebie Called B.F.F..
Cupcake Sprinkles:
HERE
Thank You Caitlin

Easy Peasy Tut, Ready?
Open your supplies in PSP.
Open a new canvas 700x700, you may resize/crop later.
Floodfill white. Add a new raster layer,selections,select all.
Resize & Copy and paste a paper from the kit into selection. Select none.
Apply a mask, and on your layers pallette merge mask group.
Resize and paste butterflyFlower2 and place above
your mask layer and position,
Resize and paste flowerdaisys and place on your canvas
Resize and paste flower ribbonxand place where you wish.
Resize and pase wordart and place top right on your canvas.
Resize and paste wordart swirly and place bottom of your canvas.
Resize and paste any other elements and place where you wish.
Drop shadow all elements and tube

See mine above or make it your own!
As always mine is just a guide.
Now X out the bottom layer and your mask layer.
Merge visable the remaining layers. Un X the hidden layers.
Position all layers nicely.
Image Resize 80-90% Bicubic resample all layers checked.

Hint: You can X out the bottom white layer
before saving to have a transparent bkg for forums..

Add your Artist © and your Name and WooT!!
You Are Done! Hope you enjoyed my tutorial & thanks for trying it!

Written by Maz May 21st, 2009
Any resemblance to another tutorial is purely coincidential.

Tuesday 19 May 2009

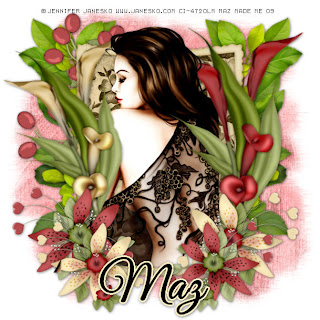
A Lady loves flowers


Here is tut for you all.
Remember to leave some LUV.♥
A Thank You goes a long way! Enjoy!

I am using the beautuful artwork of Jennifer Janesko.
You must purchase a license to use this art.
You may do so at CLIM
HERE

Supplies: 1 tube of choice & Font of choice.
I used Good Vibrations (ROB).
Mask of choice.
Scrapkit Freebie Called Just4You
It Can be found at:
Scrapping Mar:
HERE
Thank You !

Easy Peasy Tut, Ready?
Open your supplies in PSP.
Open a new canvas 700x700, you may resize/crop later.
Floodfill white. Add a new raster layer. Selections, select all.
Resize & Copy and paste a paper from the kit into selection,select none..
Apply a mask, and on your layers pallette merge mask group.
Resize and paste leaf and place above your mask layer,layer,
duplicate,image,mirror Resize and paste frame as a new layer.
click inside your frame,selection,modify,
expand by 6 resize & paste paper of choice, selection,
invert delete on your keyboard,
then selection and then select none move paper below frame.
Resize and paste tube of choice place below your frame
layer duplicate tube then move the duplicate layer above you frame,
Grab your eraser tool and erase any bits of tube from the bottom.
Resize and paste elements and place where you wish.
Drop shadow all elements and Tube.

See mine above or make it your own!
As always mine is just a guide.
Now X out the bottom layer and your mask layer.
Merge visable the remaining layers.
Un X the hidden layers. Position all layers nicely.
Image Resize 80-90% Bicubic resample all layers checked.

Hint: You can X out the bottom white layer
before saving to have a transparent bkg for forums..

Add your Artist © and your Name and WooT!!
You Are Done!
Hope you enjoyed my tutorial & thanks for trying it!

Written by Maz May 19th, 2009
Any resemblance to another tutorial is purely coincidential
.

Monday 18 May 2009

My 1st Award

Wooo Hooo
I recieved my 1st award from Chas
Thank you Chas
xx


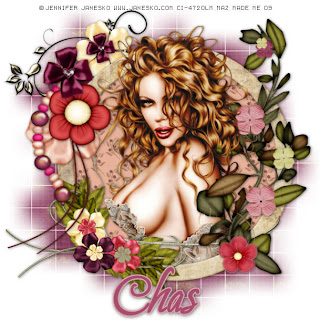
BerryLicious


Here is tut for you all.
Remember to leave some LUV.♥
A Thank You goes a long way!
Enjoy!

I am using the beautuful artwork of Jennifer Janesko.
You must purchase a license to use this art.
You may do so at CLIM
HERE

Supplies:
1 tube of choice & Font of choice.
I used P22 Petemoss (ROB).
Mask of choice.
Scrapkit Freebie Called BerryLicious
It Can be found at:
Delicious Scraps:
HERE
Thank You !

Easy Peasy Tut, Ready?
Open your supplies in PSP. Open a new canvas 700x700,
you may resize/crop later. Floodfill white. Add a new
raster layer. Selections, select all. Resize & Copy and
paste a paper from the kit into selection. Select none.
Apply a mask, and on your layers pallette merge
mask group. Resize and paste doodle and place above
your mask layer Resize and paste round frame as
a new layer click inside your frame,selection,modify,
expand by 6 resize & paste paper of choice,
selection,invert delete on your keyboard, then selection and
then select none move paper below frame. Resize and paste
tube of choice place below your frame layer duplicate tube
then move the duplicate layer above you frame, Grab your
eraser tool and erase any bits of tube from the bottom. Resize
and paste elements and place where you wish. Drop shadow
all elements and Tube. See mine above or make it your own!
As always mine is just a guide. Now X out the bottom
layer and your mask layer. Merge visable the
remaining layers. Un X the hidden layers. Position all layers
nicely. Image Resize 80-90% Bicubic resample all layers checked.

Hint: You can X out the bottom white layer before
saving to have a transparent bkg for forums..

Add your Artist © and your Name and WooT!!
You Are Done!
Hope you enjoyed my tutorial & thanks for trying it!

Written by Maz May 18th, 2009
Any resemblance to another tutorial is purely coincidential.

Sunday 17 May 2009

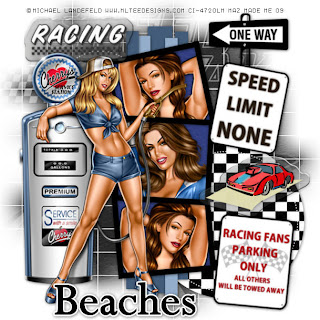
Speed Limit


Here is tut for you all.
Remember to leave some LUV.♥
A Thank You goes a long way!
Enjoy!

I am using the beautuful artwork of Michael Landefeld.
You must purchase a license to use this art.
You may do so at CILM
HERE

Supplies:
3 tubes of choice & Font of choice.
I used Riven.
Mask of choice.
Template #17 by Dee
you can get it
HERE
TY Dee ♥
Another Fabby Freebie Kit From
Tantrum Scraps which is now closed..
It's Called Speed Limit.
And It Can now be found:
HERE
Thank You Tantrum!

Ready? Lets go
Open your Template #17 by Dee,
Delete copyright layer.
I kept it at the size it is & resized later.
In layer pallet go to the bottom layer which is the
background & floodfill white
Add a new raster layer. Selections, select all.
Resize & paste a paper from the kit into selection. Select none.
Apply a mask, and on your layers pallette merge mask group.
Click on circle 1 layer,selections,select all,float,defloat
Resize and paste a paper selections,invert,delete on keyboard.
Repeat the steps above to do the rest of the of the template.
I floodfilled stips with colour from tube but its up to you.
Grab your magic wand and click inside the frame,
selections,modify,expand by 2 & paste paper of choice,
While still selected resize n paste tubes of choice.
Resize and paste elements and place where you wish.
Now resize and paste main tube and place on your tag
Drop shadow all elements and Tubes.

See mine above or make it your own!
As always mine is just a guide.
Now X out the bottom layer and your mask layer.
Merge visable the remaining layers.
Un X the hidden layers. Position all layers nicely.
Image Resize 80-90% Bicubic resample all layers checked.

Hint ;You can X out the bottom white layer
before saving to have a transparent bkg for forums..

Add your Artist © and your Name
and WooT!!You Are Done!
Hope you enjoyed my tutorial & thanks for trying it!

Written by Maz May 17th, 2009
Any resemblance to another tutorial is purely coincidental

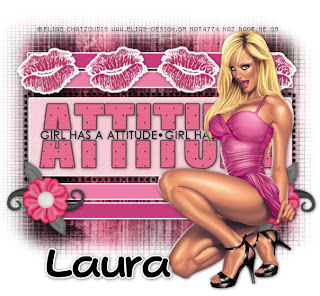
Girl has a Attitude


Here is tut for you all.
Remember to leave some LUV.♥
A Thank You goes a long way!
Enjoy!

I am using the beautuful artwork of Elias Chatzoudis.
You must purchase a license to use this art.
You may do so at MPT
HERE

Supplies:
1 tubes of choice & Font of choice.
I used Hey Gorgeous.
Mask of choice.
Template #214 by Missy
you can get it
HERE
Scrapkit Freebie now Pink-a-licious
It Can be found at:
Cinnamon Scraps:
HERE
Thank You Laura !

Ready?
Lets go Open your Template #214 by Missy,
Delete copyright layer.
Go to image then canvas size 650x650.
In your layer pallet go 2 the bottom layer which is the background & flood fill white
Add a new raster layer. Selections, select all.
Resize & Copy and paste a paper from the kit into selection. Select none.
Apply a mask, and on your layers pallette merge mask group.
Click on rectangle layer,selections,select all,float,defloat
Then choice a colour from your tube & floodfill this layer .
Repeat the steps above to do the rest of the of the template.
I used a paper for the wordart but its up to you.
Resize and paste elements and place where you wish.
Now add your tube and place on your tag
Drop shadow all elements and Tubes.

See mine above or make it your own!
As always mine is just a guide.
Now X out the bottom layer and your mask layer.
Merge visable the remaining layers. Un X the hidden layers.
Position all layers nicely. Image Resize 80-90% Bicubic resample all layers checked.

Hint ;You can X out the bottom white layer
before saving to have a transparent bkg for forums..

Add your Artist © and your Name and WooT!!
You Are Done!
Hope you enjoyed my tutorial & thanks for trying it!

Written by Maz May 17th, 2009
Any resemblance to another tutorial is purely coincidental

Saturday 16 May 2009

Lady of Leisure


Here is tut for you all.
Remember to leave some LUV.♥
A Thank You goes a long way!
Enjoy!

I am using the beautuful artwork of Jennifer Janesko.
You must purchase a license to use this art.
You may do so at CILM
HERE
Supplies:
1 tube of choice & Font of choice.
I used Riesling .
Mask of choice.

Scrapkit Freebie Called Tania Mendes
It Can be found at:
Bel Vidotti Scraps:
HERE
Thank You Bel !

Easy Peasy Tut, Ready?
Open your supplies in PSP. Open a new canvas 700x700, you may resize/crop later.
Floodfill white. Add a new raster layer. Selections,select all.
Resize & Copy and paste a paper from the kit into selection. Select none.
Apply a mask and on your layers pallette merge mask group.
Resize and paste frame and place above your mask layer click inside your frame,selection,modify,expand by 6 resize & paste paper of choice,
selection,invert delete on your keyboard,
then selection and then select none move paper below frame.
Resize and paste tube of choice place below your frame layer
duplicate tube then move the duplicate layer above you frame,
Grab your eraser tool and erase any bits of tube from the bottom.
Resize and paste elements and place where you wish.
Drop shadow all elements and Tube.
See mine above or make it your own!
As always mine is just a guide.

Now X out the bottom layer and your mask layer.
Merge visable the remaining layers. Un X the hidden layers.
Position all layers nicely. Image Resize 80-90% Bicubic resample all layers checked.

Hint;You can X out the bottom white layer before
saving to have a transparent bkg for forums..

Add your Artist © and your Name and WooT!!
You Are Done!

Hope you enjoyed my tutorial & thanks for trying it!

Written by Maz May 16th, 2009
Any resemblance to another tutorial is purely coincidental

Lust or Love


Here is tut for you all.
Remember to leave some LUV.♥
A Thank You goes a long way!
Enjoy!

I am using the beautuful artwork of Elias Chatzoudis.
You must purchase a license to use this art.
You may do so at MPT
HERE

Supplies:
1 tube of choice & Font of choice.
I used Riesling .
Mask of choice.
Scrapkit Freebie Called Lust or Love
It Can be found at:
Bluedreams Designs:
HERE
Thank You Bluey !

Easy Peasy Tut, Ready?
Open your supplies in PSP. Open a new canvas 700x700,
you may resize/crop later. Floodfill white. Add a new
raster layer. Selections, select all. Resize & Copy and paste
a paper from the kit into selection. Select none. Apply a mask,
and on your layers pallette merge mask group. Resize and paste
Ornament and place above your mask layer Resize and paste
Heart frame as a new layer click inside your frame,selection,
modify,expand by 4 resize & paste paper of choice,selection,invert
delete on your keyboard, then selection and then select none
move paper below frame. Resize and paste tube of choice place
below your frame layer duplicate tube then move the
duplicate layer above you frame, Grab your eraser tool
and erase any bits of tube from the bottom. Resize and
paste elements and place where you wish. Drop shadow all
elements and Tube. See mine above or make it your own!
As always mine is just a guide. Now X out the bottom layer
and your mask layer. Merge visable the remaining layers.
Un X the hidden layers. Position all layers nicely.
Image Resize 80-90% Bicubic resample all layers checked.

Hint: You can X out the bottom white layer before
saving to have a transparent bkg for forums..

Add your Artist © and your Name and WooT!!
You Are Done!
Hope you enjoyed my tutorial & thanks for trying it!

Written by Maz May 16th, 2009
Any resemblance to another tutorial is purely coincidental

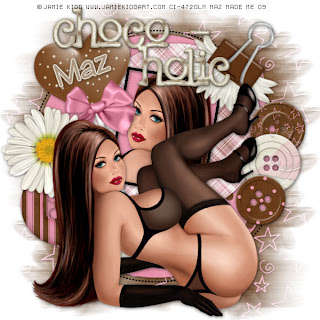
Yummy Chocoholic


Here is tut for you all.
Remember to leave some LUV.♥
A Thank You goes a long way!

Enjoy!

I am using the beautuful artwork of Jamie Kidd.
You must purchase a license to use this art.
You may do so at CILM
HERE

Supplies:
1 tube of choice & Font of choice.
I used WritePlain .
Mask of choice.

Template #210 by Missy you can get it
HERE
Scrapkit Freebie Called Chocolate Box
It Can be found at:
Sprinkle Scraps:
HERE
Thank You Caitlin ! ♥

Easy Peasy Tut, Ready?
Open your Template #210 by Missy,Delete copyright layer.
Go to image then canvas size 600x600.
In your layer pallet go 2 the bottom layer which is the
background & flood fill white
Add a new raster layer. Selections,
select all. Resize & Copy and paste a paper
from the kit into selection. Select none. Apply
a mask, and on your layers pallette merge mask group.
Got to the frame background layer,selections,select all,float,defloat
Then resize and paste a paper of choice & select none.
Repeat the steps above to do the rest of the of the template.
Grab your magic wand and click inside the large frame,
selections,modify,expand by 2 & paste your tube.
Resize and paste wordart and place where you want to
Resize and paste elements and place where you wish.
Drop shadow all elements and Tubes.
See mine above or make it your own!
As always mine is just a guide. Now X out
the bottom layer and your mask layer. Merge visable
the remaining layers. Un X the hidden layers. Position
all layers nicely. Image Resize 80-90% Bicubic
resample all layers checked.
Hint: You can X out the bottom white layer
before saving to have a transparent bkg for forums..
Add your Artist © and your Name and
WooT!! You Are Done!
Hope you enjoyed my tutorial & thanks for trying it!

Written by Maz May 15th, 2009
Any resemblance to another tutorial is purely coincidental

Among the Flowers


Here is tut for you all.
Remember to leave some LUV.♥
A Thank You goes a long way!
Enjoy!

I am using the beautuful artwork of Carlos Diez.
You must purchase a license to use this art.
You may do so at CILM;
HERE

Supplies:
1 tube of choice & Font of choice.
I used The Nautigal.
Mask of choice.
Scrapkit Freebie Called Chocolate Box
It Can be found at:
Sprinkle Scraps:
HERE
Thank You Caitlin !

Easy Peasy Tut, Ready?
Open your supplies in PSP. Open a new
canvas 700x700, you may resize/crop later.
Floodfill white. Add a new raster layer. Selections,
select all. Resize & Copy and paste a paper
from the kit into selection. Select none. Apply
a mask, and on your layers pallette merge mask group.
Resize and paste butterfly string frame as a new layer
click inside your frame,selection,modify,expand by 2 resize &
paste paper of choice,selection,invert delete on your keyboard,
then selection and then select none move paper below frame.
Resize and paste tube of choice place below your frame layer
duplicate tube then move the duplicate layer above you frame,
Grab your eraser tool and erase any bits of tube from the bottom.
Resize and paste elements and place where you wish.
Drop shadow all elements and Tube.

See mine above or make it your own!
As always mine is just a guide. Now X out
the bottom layer and your mask layer. Merge visable
the remaining layers. Un X the hidden layers. Position
all layers nicely. Image Resize 80-90% Bicubic
resample all layers checked.
Hint: You can X out the bottom white layer
before saving to have a transparent bkg for forums..

Add your Artist © and your Name and
WooT!! You Are Done!
Hope you enjoyed my tutorial & thanks for trying it!

Written by Maz May 15th, 2009
Any resemblance to another tutorial is purely coinciden
tal

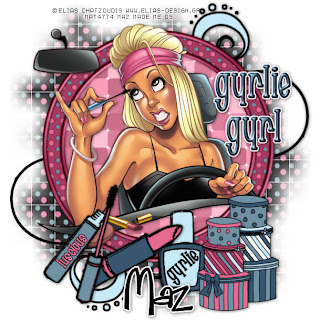
Girlie Girl


Here is tut for you all.
Remember to leave some LUV.♥
A Thank You goes a long way!
Enjoy!

I am using the beautuful artwork of Elias Chatzoudis.
You must purchase a license to use this art.
You may do so at MPT
HERE

Supplies:
1 tube of choice & Font of choice.
I used Fabulous 50's.
Mask of choice.
Scrapkit Freebie Called Oh So Gyrlie
It Can be found at:
Juicy Bits:
HERE
Thank You Cin !

Easy Peasy Tut, Ready?
Open your supplies in PSP. Open a new
canvas 700x700, you may resize/crop later.
Floodfill white. Add a new raster layer. Selections,
select all. Resize & Copy and paste a paper
from the kit into selection. Select none. Apply
a mask, and on your layers pallette merge mask group.
Resize and paste doodle and place above your mask layer.
Place doodle to right side of frame layers,duplicate,image,mirror
Resize and paste round frame as a new layer
click inside your frame,selection,modify,expand by 4 resize &
paste paper of choice,selection,invert delete on your keyboard,
then selection and then select none move paper below frame.
Resize and paste tube of choice place above your frame layer
Resize and paste elements and place where you wish.
Drop shadow all elements and Tube.

See mine above or make it your own!
As always mine is just a guide. Now X out
the bottom layer and your mask layer. Merge visable
the remaining layers. Un X the hidden layers. Position
all layers nicely. Image Resize 80-90% Bicubic
resample all layers checked.

Hint: You can X out the bottom white layer
before saving to have a transparent bkg for forums..

Add your Artist © and your Name and
WooT!! You Are Done!
Hope you enjoyed my tutorial & thanks for trying it!

Written by Maz May 15th, 2009
Any resemblance to another tutorial is purely coincidental

Heart of Roses


Here is tut for you all.
Remember to leave some LUV.♥
A Thank You goes a long way!
Enjoy!

I am using the beautuful artwork of Ismael Rac.
You must purchase a license to use this art.
You may do so at MPT
HERE

Supplies:
1 tube of choice & Font of choice.
I used A&S Snapper Script .
Mask of choice.
Scrapkit Freebie Called You make my Heart blue
It Can be found at:
Bluedreams Designs:
HERE
Thank You Bluey !

Easy Peasy Tut, Ready?
Open your supplies in PSP. Open a new
canvas 700x700, you may resize/crop later.
Floodfill white. Add a new raster layer. Selections,
select all. Resize & Copy and paste a paper
from the kit into selection. Select none. Apply
a mask, and on your layers pallette merge mask group.
Resize and paste doodle and place above your mask layer.
Place doodle to right side of frame layers,duplicate,image,mirror
Resize and paste heart frame as a new layer
click inside your frame,selection,modify,expand by 4 resize &
paste paper of choice,selection,invert delete on your keyboard,
then selection and then select none move paper below frame.
Resize and paste tube of choice place below your frame layer
duplicate tube then move the duplicate layer above you frame,
Grab your eraser tool and erase any bits of tube from the bottom.
Resize and paste elements and place where you wish.
Drop shadow all elements and Tube.
See mine above or make it your own!
As always mine is just a guide. Now X out
the bottom layer and your mask layer. Merge visable
the remaining layers. Un X the hidden layers. Position
all layers nicely. Image Resize 80-90% Bicubic
resample all layers checked.
Hint: You can X out the bottom white layer
before saving to have a transparent bkg for forums..

Add your Artist © and your Name and
WooT!! You Are Done!
Hope you enjoyed my tutorial & thanks for trying it!

Written by Maz May 14th, 2009
Any resemblance to another tutorial is purely coincidental.

Bed of Flowers


Here is tut for you all
Remember to leave some LUV.♥
A Thank You goes a long way!
Enjoy!

I am using the beautuful artwork of Steve Baier.
You must purchase a license to use this art.
Can be found
HERE

Supplies:
1 tube of choice & Font of choice.
I used SignPainter HouseScript.
Mask of choice.
Scrapkit Freebie Called Unrequited Love
It Can be found at:
Bluedreams Designs:
HERE
Thank You Bluey !

Easy Peasy Tut, Ready?
Open your supplies in PSP. Open a new
canvas 700x700, you may resize/crop later.
Floodfill white. Add a new raster layer. Selections,
select all. Resize & Copy and paste a paper
from the kit into selection. Select none. Apply
a mask, and on your layers pallette merge mask group.
Resize and paste frame as a new layer
Take magic wand hold down the shift key and click inside all the frame
selection,modify,expand by 4 resize &
paste paper of choice,selection,invert delete on your keyboard,
then selection and then select none move paper below frame.
Resize and paste tube of choice
Resize and paste elements and place where you wish.
Drop shadow all elements and Tube.

See mine above or make it your own!
As always mine is just a guide. Now X out
the bottom layer and your mask layer. Merge visable
the remaining layers. Un X the hidden layers. Position
all layers nicely. Image Resize 80-90% Bicubic
resample all layers checked.

Hint: You can X out the bottom white layer
before saving to have a transparent bkg for forums..

Add your Artist © and your Name and
WooT!! You Are Done!
Hope you enjoyed my tutorial & thanks for trying it!

Written by Maz May 14th, 2009
Any resemblance to another tutorial is purely coincide
ntal

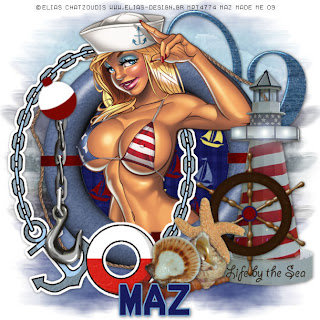
Life by the Sea


Here is tut for you all.
Remember to leave some LUV.♥
A Thank You goes a long way!
Enjoy!

I am using the beautuful artwork of Elias Chatzoudis.
You must purchase a license to use this art.
You may do so at MPT
HERE

Supplies:
1 tube of choice & Font of choice.
I used Dev Gothic.
Mask of choice.
Freebie Kit from
Tantrum Scraps which is now closed.
It's called Country Tomboy.
And it can now be found ;
HERE
Thank you Tantrum

Easy Peasy Tut, Ready?
Open your supplies in PSP. Open a new
canvas 700x700, you may resize/crop later.
Floodfill white. Add a new raster layer. Selections,
select all. Resize & Copy and paste a paper
from the kit into selection. Select none. Apply
a mask, and on your layers pallette merge mask group.
Resize and paste doodle and place above your mask layer
Resize and paste frame 5 as a new layer
click inside your frame,selection,modify,expand by 6 resize &
paste paper of choice,selection,invert delete on your keyboard,
then selection and then select none move paper below frame.
Resize and paste tube of choice place below your frame layer
duplicate tube then move the duplicate layer above you frame,
Grab your eraser tool and erase any bits of tube from the bottom.
Resize and paste the water doodle,place top right
above the mask layer and under the frame.
Resize and paste frame 4 place under frame 5 & above the mask layer.
Then layers,duplicate,more the duplicate layer to the top then delete the
parts around tube and frame so it looks like its going under & over.

Resize and paste elements and place where you wish.
Drop shadow all elements and Tube.

See mine above or make it your own!
As always mine is just a guide. Now X out
the bottom layer and your mask layer. Merge visable
the remaining layers. Un X the hidden layers. Position
all layers nicely. Image Resize 80-90% Bicubic
resample all layers checked.

Hint: You can X out the bottom white layer
before saving to have a transparent bkg for forums..

Add your Artist © and your Name and
WooT!! You Are Done!
Hope you enjoyed my tutorial & thanks for trying it!

Written by Maz May 12th, 2009
Any resemblance to another tutorial is purely coincidental

Day Dreamer


Here is tut for you all.
Remember to leave some LUV.♥
A Thank You goes a long way!
Enjoy!

I am using the beautuful artwork of Jamie Kidd.
You must purchase a license to use this art.
You may do so at CILM
HERE

Supplies:
1 tube of choice & Font of choice.
I used Passion Conflict ROB.
Mask of choice. Another Fabby Freebie Called
Denim & Daisies
It Can be found at:
Chica Designz HERE
Thank You Chica!

Ready?
Open your supplies in PSP. Open a new
canvas 700x700, you may resize/crop later.
Floodfill white. Add a new raster layer. Selections,
select all. Resize & Copy and paste a paper
from the kit into selection. Select none. Apply
a mask, and on your layers pallette merge mask group.
Resize and paste oblong frame as a new layer
click inside your frame,selection,modify,expand by 4 resize &
paste paper of choice,selection,invert delete on your keyboard,
then selection and then select none move paper below frame.
Resize and paste tube of choice place below your frame layer
duplicate tube then move the duplicate layer above you frame,
Grab your eraser tool and erase any bits of tube from the bottom.
Resize and paste doodle place top of frame and above mask layer,
Then layers,duplicate,image,miror & flip position bottom of frame.
Resize and paste elements and place where you wish.
Drop shadow all elements and Tube.

See mine above or make it your own!
As always mine is just a guide. Now X out
the bottom layer and your mask layer. Merge visable
the remaining layers. Un X the hidden layers. Position
all layers nicely. Image Resize 80-90% Bicubic
resample all layers checked.

Hint: You can X out the bottom white layer
before saving to have a transparent bkg for forums..

Add your Artist © and your Name and
WooT!! You Are Done!
Hope you enjoyed my tutorial & thanks for trying it!

Written by Maz May 12th, 2009
Any resemblance to another tutorial is purely coincidental
.

Beach Babe


Here is tut for you all.
Remember to leave some LUV.♥
A Thank You goes a long way!
Enjoy!

I am using the beautuful artwork of Pinup Toons.
You must purchase a license to use this art.
You may do so at CILM
HERE

Supplies:
1 tube of choice & Font of choice.
I used Surfer Shop BTN.
Mask of choice.
Another Fabby Freebie Called
Friendship Collection
It Can be found at:
Bel Vidotti Scraps:
HERE
Thank You Bel!

Easy Peasy Tut, Ready?
Open your supplies in PSP. Open a new
canvas 700x700, you may resize/crop later.
Floodfill white. Add a new raster layer. Selections,
select all. Resize & Copy and paste a paper
from the kit into selection. Select none. Apply
a mask, and on your layers pallette merge mask group.
Resize and paste square frame of choice,
click inside your frame,selection,modify,expand by 6 resize &
paste paper of choice,selection,invert delete on your keyboard,
then selection and then select none move paper below frame.
Resize and paste the palm tree as a new layer
place top right above your frame.
Resize and paste elements and place where you wish.
Resize and paste your tube of choice
Drop shadow all elements and Tube.

See mine above or make it your own!
As always mine is just a guide. Now X out
the bottom layer and your mask layer. Merge visable
the remaining layers. Un X the hidden layers. Position
all layers nicely. Image Resize 80-90% Bicubic
resample all layers checked.

Hint: You can X out the bottom white layer
before saving to have a transparent bkg for forums..

Add your Artist © and your Name and
WooT!! You Are Done!
Hope you enjoyed my tutorial & thanks for trying it!

Written by Maz May 12th, 2009
Any resemblance to another tutorial is purely coincidental

Lilac & Cream


Here is another tut for you all.
Remember to leave some LUV.♥
A Thank You goes a long way!
and Thank YOU To all who do!
Enjoy!

Click tag to get full view.
You must have a working knowledge of PSP.
I am using the beautuful artwork of Jennifer Janesko.
You must purchase a license to use this art.
You may do so at CILM
HERE

Supplies:
1 tube of choice & Font of choice.
I used TheNautiGal
Mask of choice.
Amazing Freebie Called Lilac Dreams.
It Can be found at:
Simply Sensational Scraps:
HERE
Thank You Monica

OK, Ready?
Open your supplies in PSP. Open a new
canvas 700x700, you may resize/crop later.
Floodfill white. Add a new raster layer. Selections,
select all. Resize & Copy and paste a paper
from the kit into selection. Select none. Apply a mask
and on your layers pallette merge mask group.
Resize and paste frame and place above your mask layer
click inside your frame,selection,modify,expand by 4 resize &
paste paper of choice,selection,invert delete on your keyboard,
then selection and then select none move paper below frame.
Resize and paste tube of choice place below your frame layer
duplicate tube then move the duplicate layer above you frame,
Grab your eraser tool and erase any bits of tube from the bottom.
Resize and paste ornament 2 place above mask layer,but under frame,
duplicate,image,mirror and place so they stick on top of frame.
Now simply resize and add some flowers,
butterflies and a bow, pasting them all
as new layers all around your frame.
Drop shadow all elements and Tube.

See mine above or make it your own!
As always mine is just a guide. Now X out
the bottom layer and your mask layer. Merge visable
the remaining layers. Un X the hidden layers. Position
all layers nicely. Image Resize 80-90% Bicubic
resample all layers checked.

Hint: You can X out the bottom white layer
before saving to have a transparent bkg for forums..

Add your Artist © and your Name and
WooT!! You Are Done!
Hope you enjoyed my tutorial & thanks for trying it!

Written by Maz May 12th, 2009
Any resemblance to another tutorial is purely coincidental

Flower Girl


Here is tut for you all.
Remember to leave some LUV.♥
A Thank You goes a long way!
Enjoy!

I am using the beautuful artwork of Jamie Kidd.
You must purchase a license to use this art.
You may do so at CILM
HERE

Supplies:
2 tubes of choice & Font of choice.
I used Poor Richard.
Mask of choice.
Template #204 by Missy you can get it
HERE
Scrapkit Freebie Called Slave
It Can be found at:
Bluedreams Designs:
HERE
Thank You Bluey !

Ready? Lets go
Open your Template #204 by Missy,Delete copyright layer.
Go to image then canvas size 600x600.
In your layer pallet go 2 the bottom layer which is the
background & flood fill white
Add a new raster layer. Selections,
select all. Resize & Copy and paste a paper
from the kit into selection. Select none. Apply
a mask, and on your layers pallette merge mask group.
Got to the frame background layer,selections,select all,float,defloat
Then resize and paste a paper of choice & select none.
Repeat the steps above to do the rest of the of the template.
Grab your magic wand and click inside the large frame,
selections,modify,expand by 2 & paste your tube.
Do the same with the small frame & add your paper & tube
Resize and paste ribbons and place above your mask layer.
Resize and paste elements and place where you wish.
Drop shadow all elements and Tubes.

See mine above or make it your own!
As always mine is just a guide. Now X out
the bottom layer and your mask layer. Merge visable
the remaining layers. Un X the hidden layers. Position
all layers nicely. Image Resize 80-90% Bicubic
resample all layers checked.

Hint: You can X out the bottom white layer
before saving to have a transparent bkg for forums..

Add your Artist © and your Name and
WooT!! You Are Done!
Hope you enjoyed my tutorial & thanks for trying it!

Written by Maz May 11th, 2009
Any resemblance to another tutorial is purely coincidental

A Bugs Life


Here is tut for you all.
Remember to leave some LUV.♥
A Thank You goes a long way!
Enjoy!

I am using the beautuful artwork of Elias Chatzoudis.
You must purchase a license to use this art.
You may do so at MPT
HERE

Supplies:
1 tube of choice & Font of choice.
I used Sherwood.
Mask of choice.
Scrapkit Freebie Called April Showers
It Can be found at:
Bluedreams Designs:
HERE
Thank You Bluey !

Easy Peasy Tut, Ready?
Open your supplies in PSP. Open a new
canvas 700x700, you may resize/crop later.
Floodfill white. Add a new raster layer. Selections,
select all. Resize & Copy and paste a paper
from the kit into selection. Select none. Apply
a mask, and on your layers pallette merge mask group.
Resize and paste doodles and place above your mask layer
Resize and paste round frame as a new layer
click inside your frame,selection,modify,expand by 4 resize &
paste paper of choice,selection,invert delete on your keyboard,
then selection and then select none move paper below frame.
Resize and paste tube of choice place below your frame layer
duplicate tube then move the duplicate layer above you frame,
Grab your eraser tool and erase any bits of tube from the bottom.
Resize and paste elements and place where you wish.
Drop shadow all elements and Tube.

See mine above or make it your own!
As always mine is just a guide. Now X out
the bottom layer and your mask layer. Merge visable
the remaining layers. Un X the hidden layers. Position
all layers nicely. Image Resize 80-90% Bicubic
resample all layers checked.

Hint: You can X out the bottom white layer
before saving to have a transparent bkg for forums..

Add your Artist © and your Name and
WooT!! You Are Done!
Hope you enjoyed my tutorial & thanks for trying it!

Written by Maz May 11th, 2009
Any resemblance to another tutorial is purely coincidental
.

Ice Cream Yummy


Hiya Peeps!
Here is tut for you all.
Remember to leave some LUV.♥
A Thank You goes a long way!
Enjoy!

I am using the beautuful artwork of Elias Chatzoudis.
You must purchase a license to use this art.
You may do so at MPT
HERE

Supplies:
1 tube of choice & Font of choice.
I used Wil & Grace.
Mask of choice.
Scrapkit Freebie Called Ice Cream Delight
It Can be found at:
Scraps Dimensions:
HERE
Thank You !

Easy Peasy Tut, Ready?
Open your supplies in PSP. Open a new
canvas 700x700, you may resize/crop later.
Floodfill white. Add a new raster layer. Selections,
select all. Resize & Copy and paste a paper
from the kit into selection. Select none. Apply
a mask, and on your layers pallette merge mask group.
Resize and paste the Ice cream stand as a new layer,
Resize and paste the Ice cream truck as a new layer.
Copy and Paste tube of choice and place
in front of the Ice cream stand.
Resize and paste elements i used ice
creams and put them at sides.
Drop shadow all elements and Tube

See mine above or make it your own!
As always mine is just a guide. Now X out
the bottom layer and your mask layer. Merge visable
the remaining layers. Un X the hidden layers. Position
all layers nicely. Image Resize 80-90% Bicubic
resample all layers checked.

Hint: You can X out the bottom white layer
before saving to have a transparent bkg for forums..

Add your Artist © and your Name and
WooT!! You Are Done!
Hope you enjoyed my tutorial & thanks for trying it!

Written by Maz May 11th, 2009
Any resemblance to another tutorial is purely coincidental.